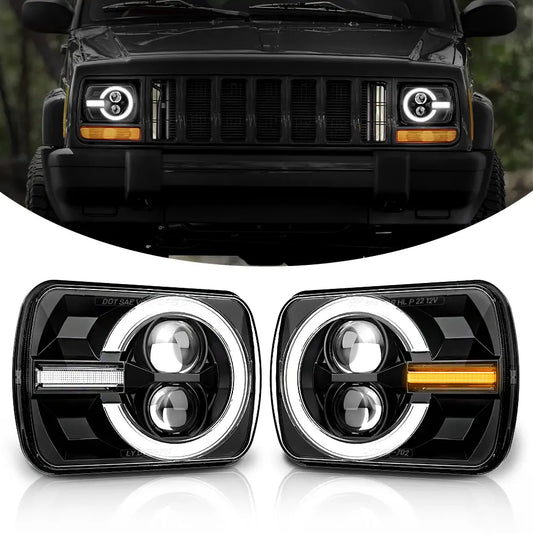
Jeep Cherokee owners frequently encounter a common issue when upgrading their headlights to LED. The problem lies in the electrical system's compatibility with the new lighting technology. In this blog post, we will delve into why an H4 Relay Kit is crucial during the LED headlight upgrade process for the Jeep XJ. Furthermore, we will provide a comprehensive guide on how to install the relay kit, ensuring a seamless transition to LED headlights.

Why You Need an H4 Relay Harness Kit
The H4 Relay Kit is a versatile headlight harness that can be used for various vehicle models, including the Jeep Cherokee XJ, Wrangler YJ etc. Its primary purpose is to redirect the power supply for your headlights, bypassing the headlight switch. This is crucial because the headlight switch can cause parasitic draw, leading to flickering issues when using LED headlights or even affecting the brightness of factory headlights. By utilizing relays, the H4 Relay Harness Kit eliminates these concerns and ensures a stable power supply, resulting in consistent and reliable lighting performance.
The Components of an H4 Relay Harness Kit
The H4 Relay Harness Kit consists of several essential components that work together to provide a stable and efficient power supply to your LED headlights. Here's an overview of what you can expect to find in the kit.

- Two Relays: These relays play a vital role in diverting the power away from the headlight switch. By doing so, they eliminate any potential issues associated with parasitic draw and ensure a consistent power supply to your headlights.
- Plug-and-Play Connectors: The kit includes plugs specifically designed to connect seamlessly with your LED headlights. These connectors make the installation process hassle-free and allow for easy integration into your existing wiring setup.
- Factory Wiring Harness Connector: Another essential component of the H4 Relay Harness Kit is a plug that connects directly to your Jeep Cherokee's factory wiring harness. This plug serves as a signal source, detecting when the headlights are turned on from the factory switch and activating the relays accordingly.
- Ring Terminals: To establish a solid ground connection and connect to the battery, the kit usually provides 2 ring terminals. These terminals ensure a secure and reliable electrical connection, enhancing the overall performance of your LED headlights.
- 30 Amp Fuse: Safety is a top priority, which is why the H4 Relay Harness Kit includes a 30 amp fuse. This fuse protects the electrical circuit from any potential overloads, ensuring the longevity and safety of your LED headlights.
Install the headlight harness
Now that we have discussed the components of an H4 Relay Harness Kit, let's move on to the installation process. To begin installing the relay harness, we need to remove the headlights and grille from the Jeep Cherokee. This step allows us to route the new wires and ensure a clean and organized installation.
Remove the Headlight Bezels and Grille:
- Start by removing the two headlight bezels to gain access to the grille.
- Carefully detach the grille by removing four Phillips screws along the top side.
- The grille is also secured by clips along the bottom, so gently release them to remove the grille.
Remove the Headlights
- Each headlight is held in place by a chrome trim piece.
- Locate and remove the two screws on the top and two screws on the bottom of the trim piece.
- Depending on the type of headlights you have, these screws may be Phillips or Torx, so handle them carefully.
- Take note that these screws can strip easily and may rust, so be cautious during removal.
- Once the screws are removed, use a screwdriver to gently release the headlight from its position.
- Remove the metal retaining ring and detach the headlight from the back.
Unplug the Standard H4 Connector
- Locate the standard H4 connector at the back of the headlight.
- Unplug the connector to detach it temporarily.
- Follow the same steps outlined above to remove the headlight, trim piece, and retaining ring on the other side of the Jeep Cherokee.
- The exact process to uninstall the headlights for a 97 to all the way to 2001 are all the same.
Mounting The Relays
- Locate a suitable area on the inner fender, near the battery, to mount the relays.
- Utilize the two holes on the relay to bolt it securely in place.
- Ensure the relays are positioned for easy access and proper cable routing.
Route the positive wire
- Decide whether to connect the main power to the positive terminal of the battery or the fuse box's main positive power.
- If connecting to the fuse box, locate the appropriate terminal and establish a solid connection.
- Or route the positive wire from the new wiring harness to the fuse box bracket
- Zip-tie it for easy access to the fuse holder.
- Ensure the main power connection is secure and well-insulated.
Connecting the Male Connector of Passenger Side
- Plug the male connector from the relay harness into the existing factory wiring harness on the passenger side front headlight.
- Ensure a secure connection to establish the electrical link.
Connecting the Female H4 Connector of Passenger Side
- Take the short wire coming off the relays and connect the female H4 connector.
- This connector will be plugged into the new passenger side original headlight plug.
Routing the Wire Harness
- With the relay and connectors in place, route the wire harness towards the driver's side headlight.
- Ensure the wire length is sufficient to reach the desired destination.
- Avoid any sharp edges or hot components that could damage the wires.
Connecting the Driver's Side H4 Connector
- Connect the H4 female connector at the end of the wire harness to the new driver's side headlight.
- Ensure a secure and snug connection for proper electrical contact.
- You can simply ignore the original factory plug and ensure it is covered with electrical tape for water protection. Securely tuck it away.
Reinstalling the Battery (If Removed)
- If the battery was removed to provide more room for mounting the relays and routing the harness, reinstall it securely.
Securing the Relays and Harness
- Double-check all connections to ensure they are secure and properly plugged in.
- Use zip ties or wire loom to secure and organize the wire harness, preventing any loose or dangling wires.
- Ensure the battery connections are tight and properly secured.
By following these steps, you can successfully install the H4 Relay Harness Kit for your upgraded LED headlights in your Jeep Cherokee XJ. With the installation complete, don't forget to reattach the grill, ensuring a seamless integration of your new LED headlights. Now, you can hit the road with confidence, enjoying the enhanced brightness and clarity provided by your upgraded lighting system.


1 条评论
Hello, I have done an H4 harness upgrade on my cherokee XJ 2000 limited and want to connect my new Loyo LED headlights. However, I discovered that I not only have an H4 plug on my old headlights but also 2 other cables: The day running lights. Is there any instruction how to connect these DRL’s wires to the new ledlights?
Awaiting your reply,
Kind regards,
JanGrisnich